Learning to EQ properly is probably one of the most challenging aspect of mixing, especially in a live setting with limited time to get everything perfect before service starts. Unfortunately, there really aren’t any magical formulas that I can give you to make any instrument sound perfect, and what works for me may not always work for you, but I can give you some overall guidelines that will hopefully set you on the right track.
First off, why is EQ such a difficult thing to get right? To me, the struggle is in three different areas: Perception, Execution, and Balance. If we can get those three steps worked out, we’ll be on our way to a very well EQ’d mix. So let’s break them down one by one.
At the top of the list we have perception. Basically this just means perceiving or recognizing that there is an issue that we want to correct with EQ. This is probably one of the most difficult parts starting out in mixing because it’s very subjective. Maybe you like a bunch of high-mid ‘click’ in your kick drum, or maybe you don’t. Some people like to scoop out a ton of the lows in the acoustic guitar, but some people don’t. It’s all about what sounds good to you. But here’s the key…it’s got to sound good to the majority of your congregation too. This is the area where it really helps to have a reference mix to play through your sound system and compare your mix to. It could be anything, but I’d probably choose something that’s relatively close to the style that you’re mixing. Right now I really like the sound of the new Jesus Culture live record, so I’ll play that off my computer and really listen to how the mix sounds in the room, and then try to get close to that when I’m mixing live. Obviously, you want to put your own personal spin on the mix, but having a reference mix to get you started is a great way to start building your sound. When listening to your reference mix, try to imagine the EQ curve that each of the instruments in that mix has. Dissect the mix and try to pick out each instrument and how it fits together with all of the others to form a good mix. I usually break it down in to four frequency ranges (Low, Low-Mid, High-Mid, and High) and I try to pick out what’s going on in each of them for all the instruments. Then, when I come back to my mix, I listen through those same frequency ranges to see how my sounds compare.
While I’m in the “Perception” stage, the first thing I always focus on are the problems that I need to fix with EQ, rather than the good frequencies that a might want to enhance with EQ. For example, I would listen first to see if the low mid’s of my vocal are muddy before I would listen to see if the breathy high frequencies are awesome. My number one rule with EQ is correct first, enhance second. Honestly, if you just focus on fixing problems, you may not even have to enhance things that much because all the things that were wrong won’t be covering up all the things that were good.
The second stage is execution. This is where things get a little more technical in terms of how we’ll actually be correcting the EQ problem that we identified during our perception stage. Let’s talk a little bit about how an equalizer works so we can understand how to do that. On it’s most fundamental level, the EQ on our mixing console is like a glorified version of the Bass, Middle, and Treble controls on your car stereo. In that example you have your three different frequency ranges (low, mid, and high) and you can either make them louder or softer to get the sound that you want. The controls on your mixing console are really just a glorified version of that same setup. The main difference is that what you’ll find on a mixing board is typically something called a “parametric” equalizer. That’s a very fancy way of saying that you can control what frequency you’re boosting or cutting. In our car stereo example, the knob just says “bass”. Well…what does that really mean? Is it boosting at 60 Hz? 120 Hz? 40 Hz? Those are all classified as “bass”, but a boost or cut at one of those frequencies will sound very different from the others. That’s where the frequency knob on your parametric EQ comes in. It allows you to choose the frequency that you’ll be working with.
The next knob that we’ll be dealing with after we’ve picked our frequency is the gain knob. This just tells how much we are going to boost or cut that particular frequency. Yours might go to plus or minus 15 dB which means that you can boost or cut up to 15 decibels from that particular frequency. The amount that you boost or cut will really depend on what your what your ear tells you is right. It could be that you need to boost 2 db…or maybe a full 15. It’s all up to how it sounds to you.
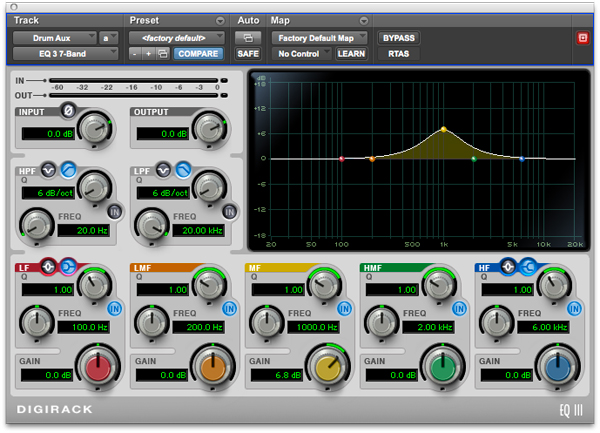
The last knob that we’ll have to deal with is the ‘Q‘ knob. This is the one that’s really mysterious for a lot of people, but it’s actually very important so it’s worth your time to learn how to use it. Essentially the Q control adjusts how wide or narrow the frequency range that you’re boosting or cutting will be. Wait…what?? Ok, let me break that down for you. The Q control can also be called the bandwidth control. That term actually makes a little more sense to me because it talks about the width of the boost or cut that we’re making. Remember that EQ curves are bell-shaped, so just because you have your mid frequency knob set at 1000 Hz, you’re not just effecting 1000 Hz, you’re actually effecting a range of frequencies with 1000 Hz as the center. For example, if we have a narrow Q with our frequency set at 1000 Hz, we would only be effecting a small portion of the sound, like maybe 800 Hz up to 1200 Hz. That might look something like this:

Then, if we had a wider Q, our frequency range would be more broad and we might be affecting a range from around 300 Hz, all the way up to 5 kHz which would look like this:
Now, why would we care about this? Actually the answer is pretty simple: we can control the sound more effectively and precisely. If there’s an annoying ring in the snare drum, I would use a cut with a very narrow Q to precisely go in and cut that one offending frequency without effecting the overall sound of the snare. If I had used a wider Q to do that, I would have taken out the bad ring, but I probably also would have cut a lot of the good frequencies surrounding the bad one. As a general rule, I like to cut with a narrow Q, and boost with a wide Q. It just sounds more pleasant to my ears.
Last but not least, we have the area of balance. This step has to do with the concept of “how do the sounds that I’ve just EQ’d all fit together?”. Let’s take a common example: the human voice gets a lot of it’s clarity and intelligibility from the 2k to 4k range. So you solo your 4 vocalists one at a time and boost some 3.5k to bring that out a little more. One their own, they sound great! But then…you take your mix off solo…and it’s the most harsh, terrible, abrasive sounding mix you’ve ever heard! What happened? Well, you’ve overdone the 3.5k obviously, but how? You only boosted a couple dB on each vocalist? Well unfortunately, sometimes that’s all it takes to overpower a mix. That’s where balance comes in. You can’t necessarily boost or cut all the same frequencies across a lot of instruments and get away with it. Otherwise the frequencies start to build up and get overpowering. EQing a mix is a lot like putting together a puzzle. You have to find out how all the pieces fit together in order to get a complete picture of the song. Maybe, instead of boosting all of our vocals at 3.5k, we could have cut our guitars at that range to make room for the vocals to come through. Same thing with bass guitar and your kick drum. Is it hard to hear the actual notes the bass is playing? Cut some low mids from the kick for the bass to live in, and then cut some low end from the bass for the kick drum to come through. Now, instead of two instruments fighting over one frequency range, you’ve got two instruments working together and complimenting each other. Your mix will get radically better if you just think about that. When every instrument has it’s own space to live in, mixing becomes effortless because frequencies aren’t competing with each other.
So that wraps it up! Perception, Execution and Balance. If you can get those and train your ear to recognize where problem areas are, you’ll be EQing fantastic mixes in no time! Please feel free to leave any questions in the comments area and we’ll do our best to respond to them!